Building Loan Eligibility Form – Part 2
📄 Download PDF Documentation
In the last tutorial, we set up a step form with 9 steps. Now, it’s time to make our form dynamic by setting up various logic. You can check out Part 1 of this tutorial here
Part 2: Setting up the logic
1. Having completed the form setup, we can now move on to implementing logic. To do this, simply select the “Logic” tab located on the right sidebar.
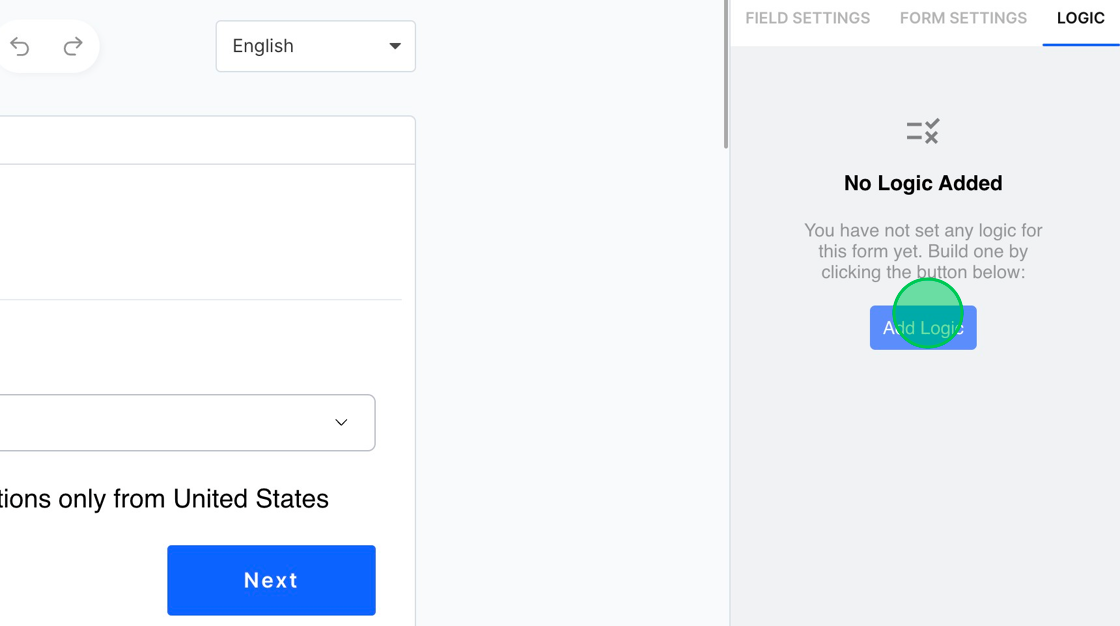
2. Upon navigating to the logic section, you’ll notice an empty screen since no logical conditions have been set yet. To begin, click on the “Add Logic” button. For our initial logic setup, we’ll configure it to permit only users from the United States to access the assessment form.
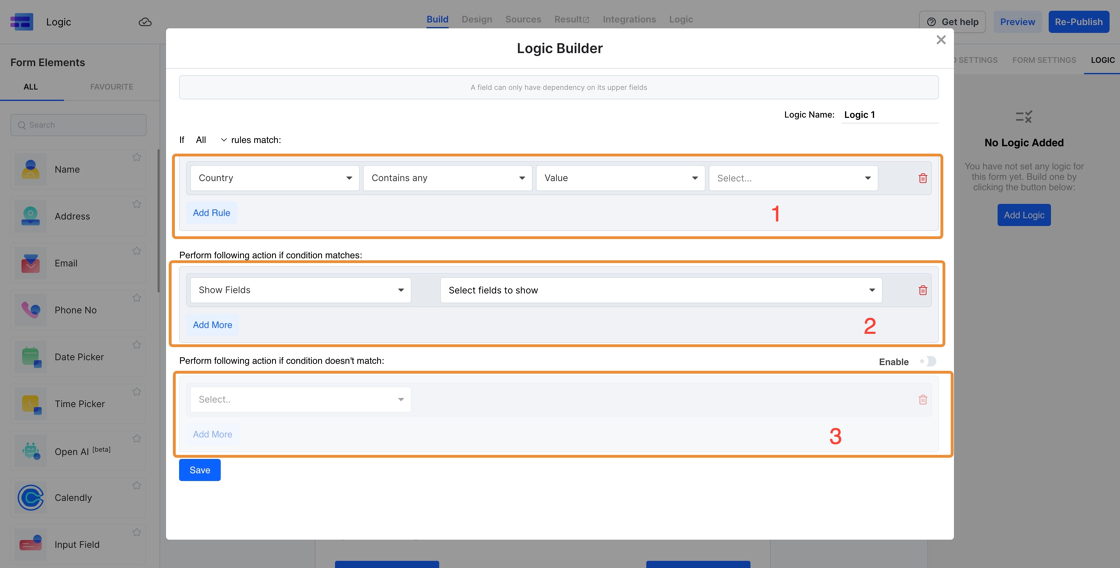
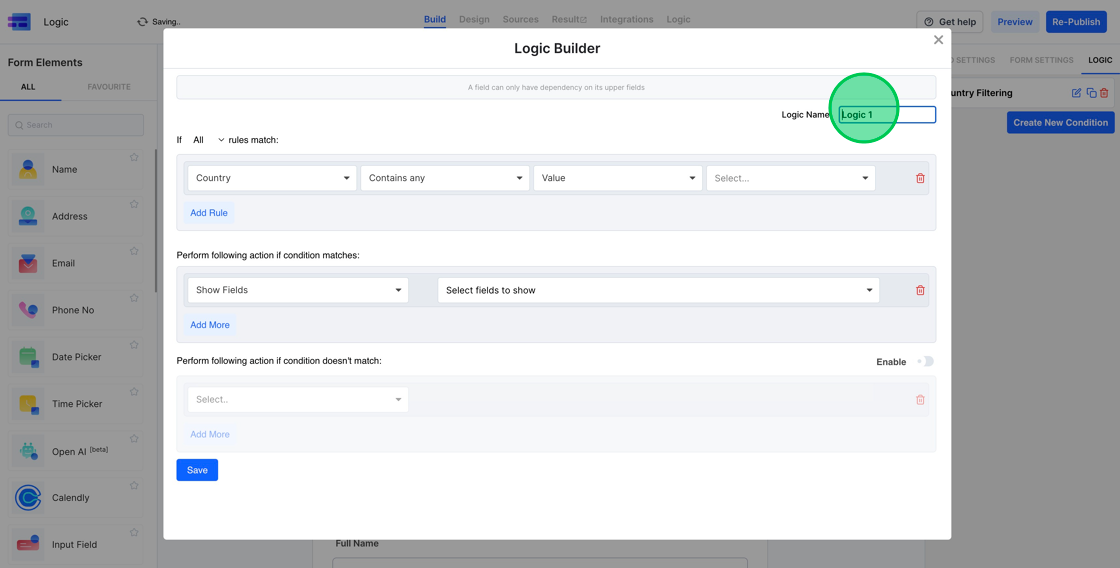
3. Once you select the “Add Logic” button, the Logic Builder interface will appear. This builder is divided into three distinct sections:
- The Condition
- Actions to execute when the condition is met
- Actions to execute when the condition is not met.
4. For ease of future reference, you have the option to assign a name to the condition. In this case, we’ll label our initial logic “Country Filtering”.
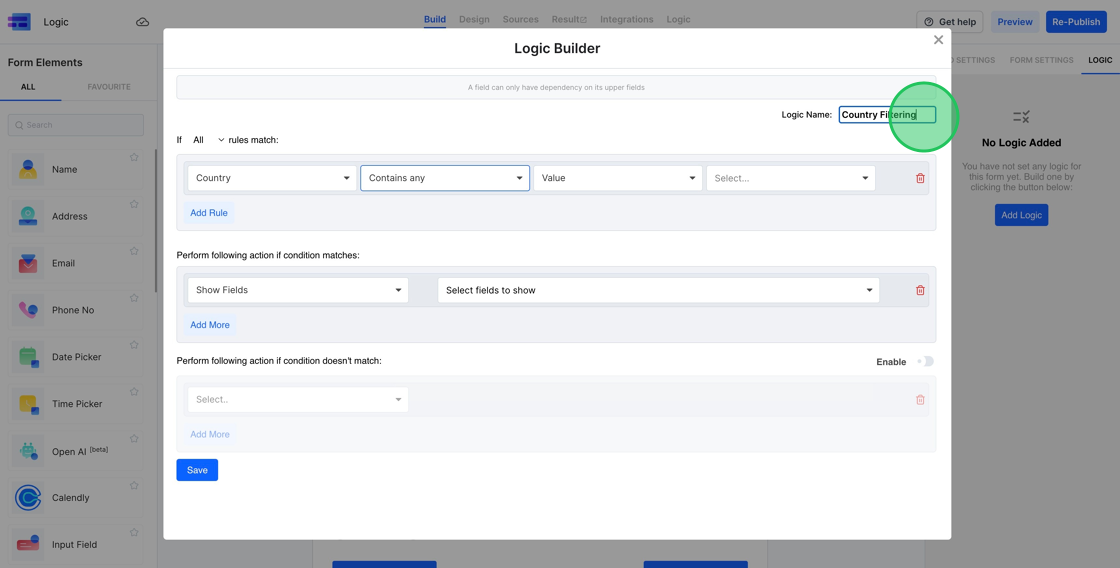
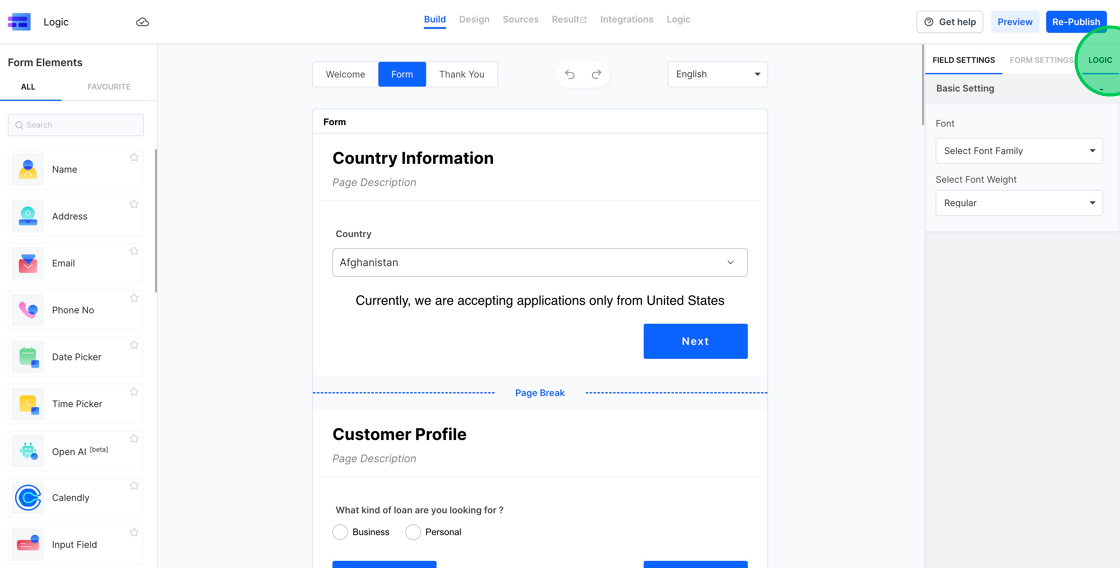
5. Our objective is to configure the logic so that the system verifies the “Country” field. If the input for the Country field is anything other than “United States”, we want to conceal all subsequent steps and display a message to the user. To achieve this, we’ll use the “Not Contains” logic option and specify it for the value “United States”.

6. If the country specified isn’t “United States”, we want to display the message “Currently, we are accepting applications only from the United States.” To implement this, in the “condition matches” section, select the “Show Fields” option and then pick the paragraph text.

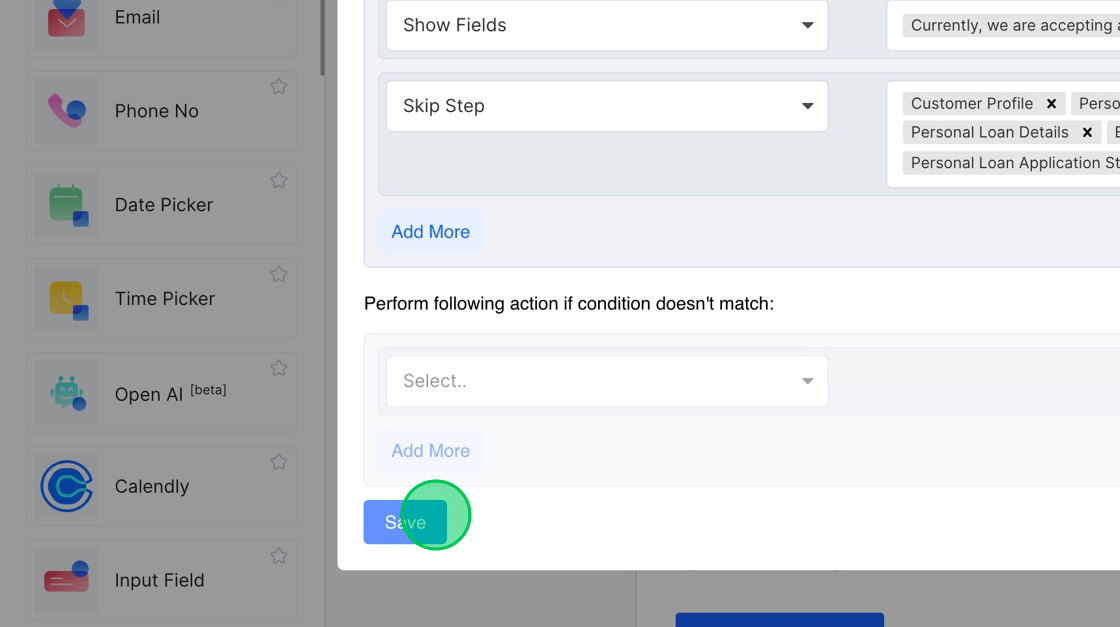
7. Following that, since the user isn’t from the “United States”, we aim to bypass all subsequent steps. To achieve this, click on the “Add More” button, choose the “Skip Steps” option, and then select all the steps you intend to skip.

8. To finalize and store this logic configuration, simply click the “Save” button.
9. To promptly verify this condition, click on the “Design Tab”

10. With no country selected by default, the display correctly shows the message indicating that applications are currently not being accepted from outside the United States.
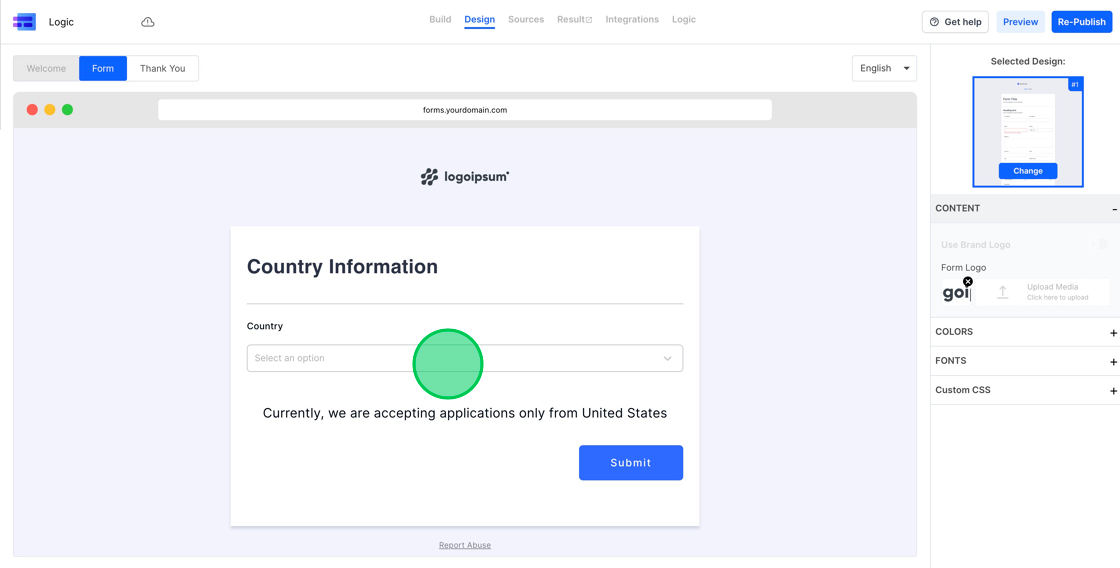
11. Upon choosing “United States” from the options, the previously displayed message vanishes, and we are provided with the “Next” button, allowing us to move forward.

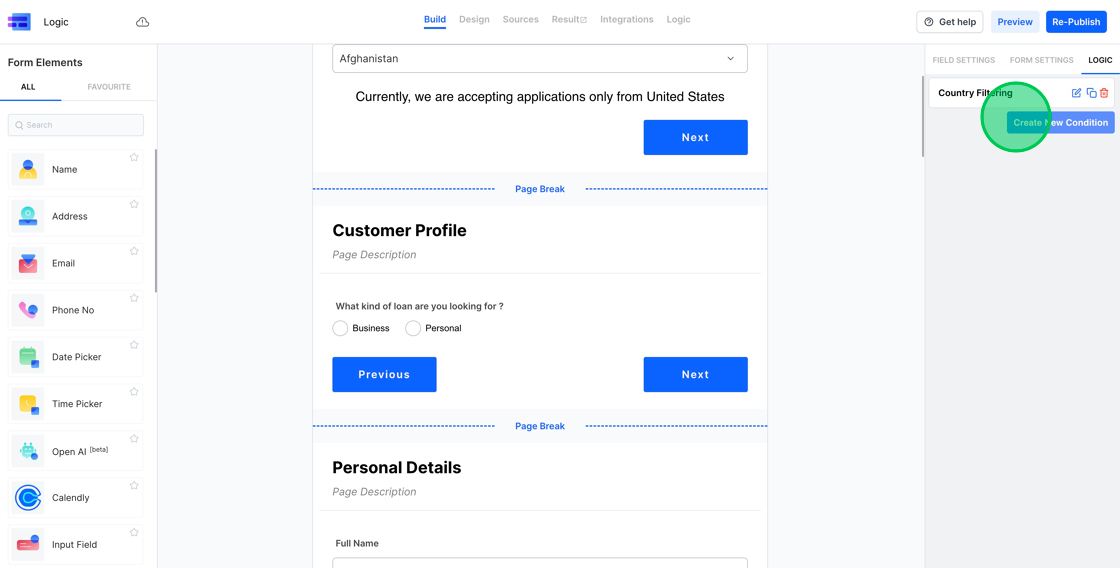
12. Next, we’ll work on setting up a condition that hides specific steps based on the type of loan the user is applying for. Remember, there’s no cap on the number of conditions you can configure. Navigate to “Logic” and you’ll observe the “Country Filtering” condition we previously established. To create a new condition, simply click on the “Create New Condition” button.
13. We’ll label this new condition as “Loan Type”.
14. Initially, we’ll define the condition. To achieve this, we’ll evaluate the response to the question “What kind of loan are you looking for?”. For our condition, we’ll set the comparison value to “Business”.

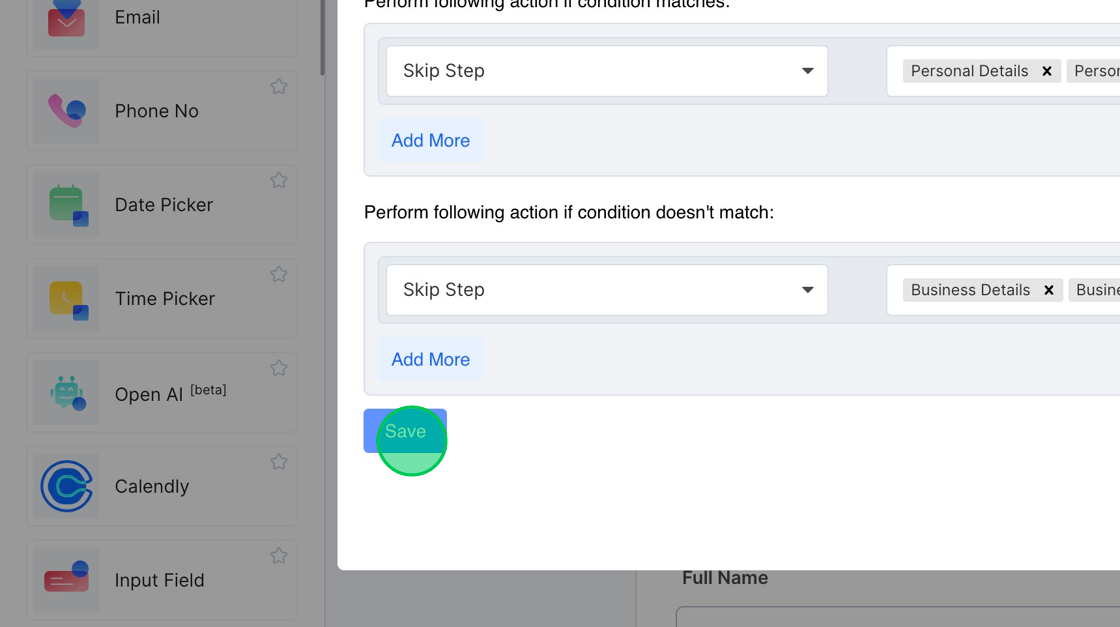
15. If the set condition is met, we aim to bypass all the steps pertaining to “Personal Loan”. To implement this, choose the “Skip Steps” option and then pick all the relevant steps you intend to skip. In this scenario, the steps to be skipped are “Personal Details”, “Personal Loan Details”, and “Personal Loan Application Status”.

16. When the set condition isn’t met, we’ll hide all steps associated with “Business Loan”. Given that our primary condition checks if the Loan Type is “Business” and conceals all steps related to Personal Loan, the “condition doesn’t match” section will act when the Loan Type is “Personal” and will subsequently hide all steps linked to Business Loan.

17. To conclude and store this logic configuration, simply press the “Save” button.
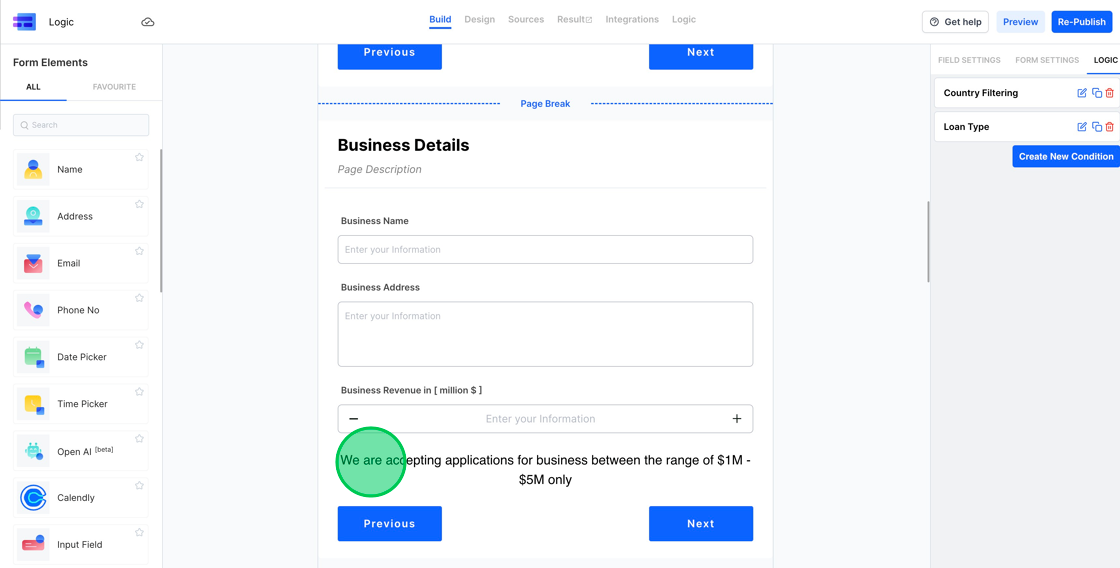
18. Next, we’re going to set up logic to evaluate a business’s revenue. We’re targeting businesses that report revenues between 1M to 5M. We’ll use conditions to check these values.
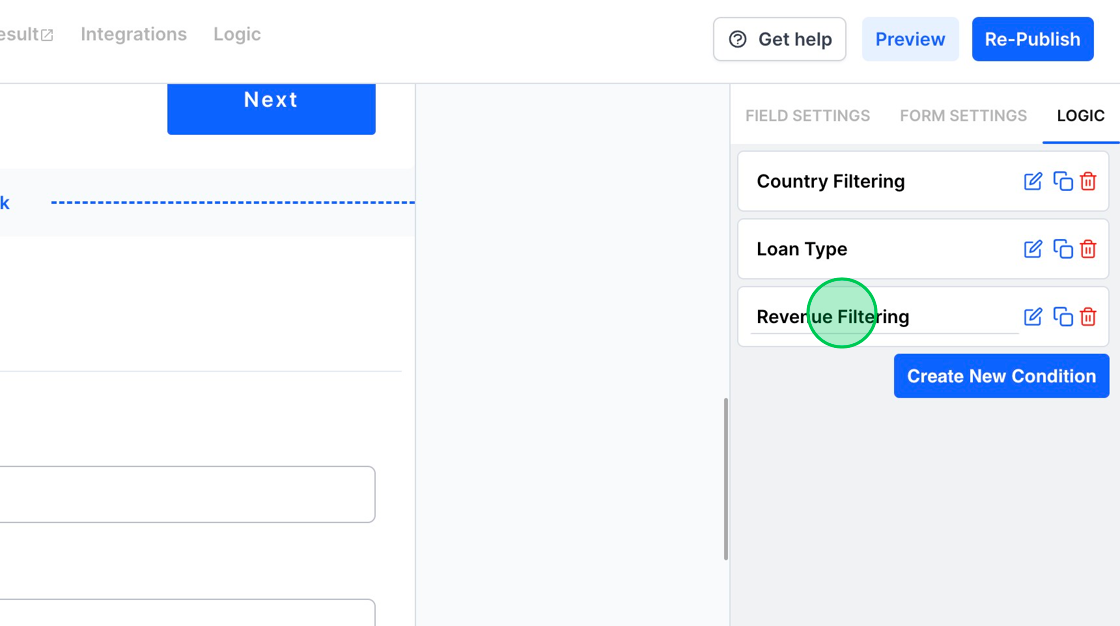
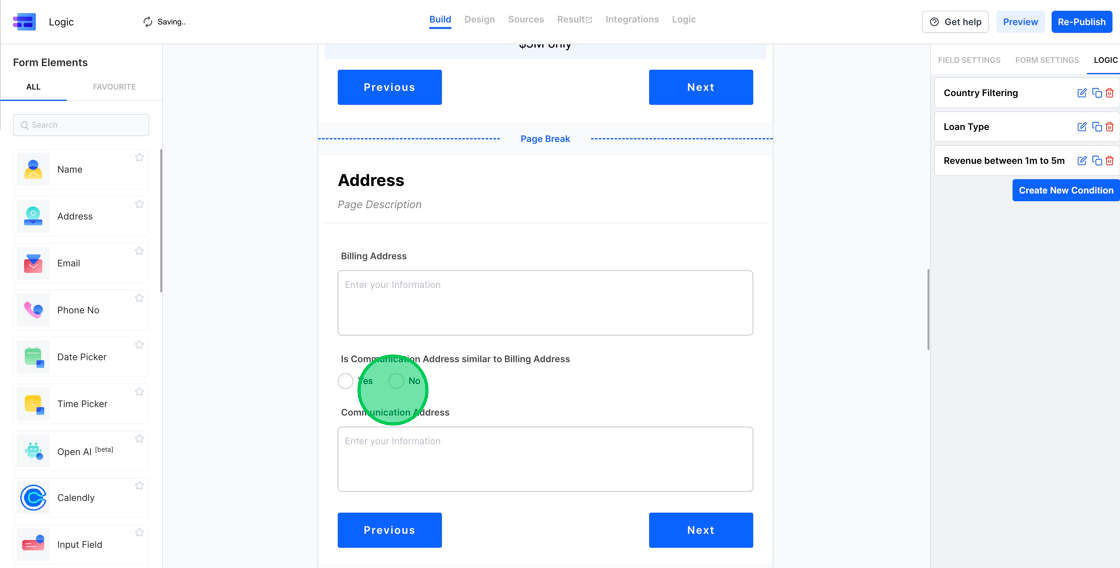
19. Navigate to the “Logic” section, create a new condition, and label it as “Revenue Filtering”.

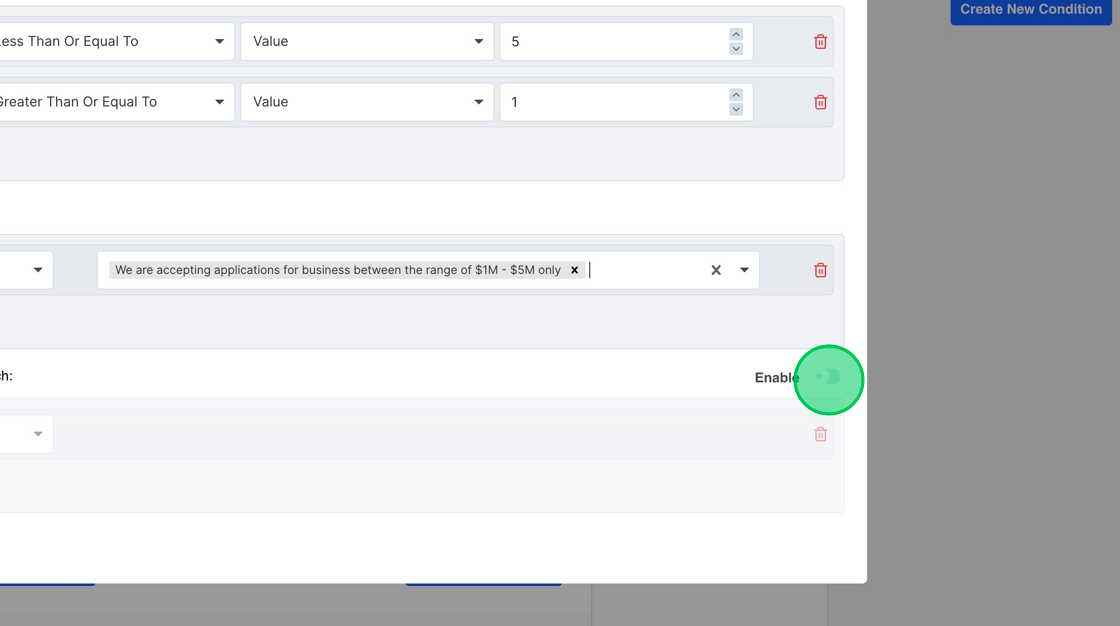
20. Begin by selecting the “Business Revenue in [million $]” field. To ensure the revenue stays within the range of $1M – $5M, we’ll configure two conditions:
- Business Revenue should be less than or equal to $5M.
- Business Revenue should be greater than or equal to $1M.
To make certain that both of these conditions are simultaneously met, choose the “All” option at the top. Selecting “All” means both conditions need to be satisfied. Conversely, if “Any” is chosen, then only one of the conditions needs to be fulfilled.

21. When the conditions are met, we aim to hide the text displaying the message about “Revenue”. To do this, select the “Hide Fields” option and then pick the specific text element you intend to hide.

22. If the conditions aren’t met, we need to take the appropriate actions. These actions will display the message and bypass the relevant steps. Begin by toggling on the “Enable” button in the “condition doesn’t match” section.
23. The initial step is to reveal the message. Achieve this by selecting the “Show Fields” option and then choosing the text message field.

24. To prevent any subsequent steps, simply click on the “Add More” button.
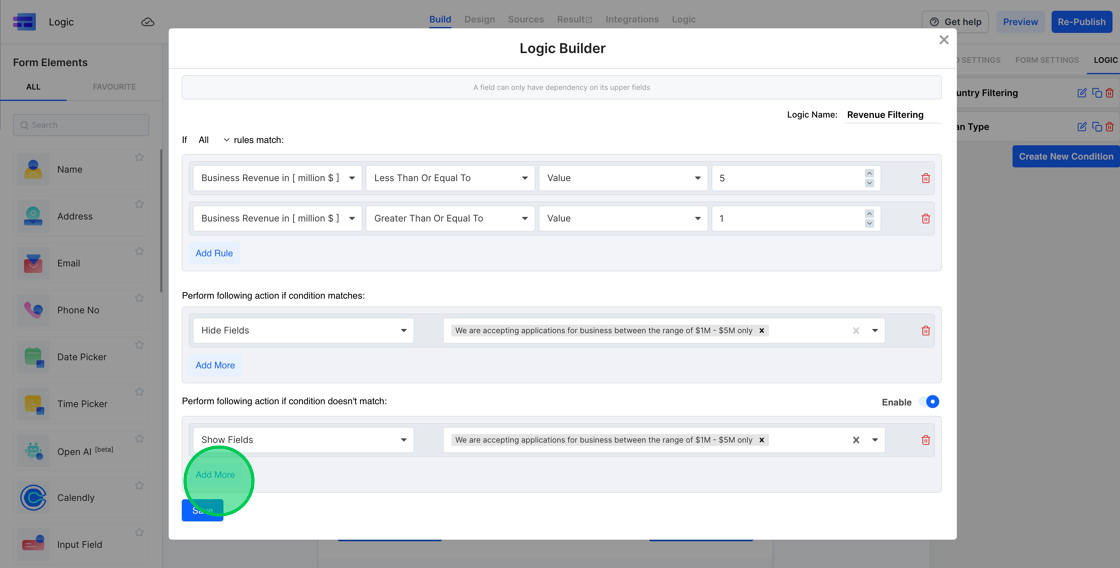
25. Following that, choose the “Skip Steps” option. From there, pick all the steps you’d like to bypass.

26. Conclusively, press the “Save” button to store this condition.
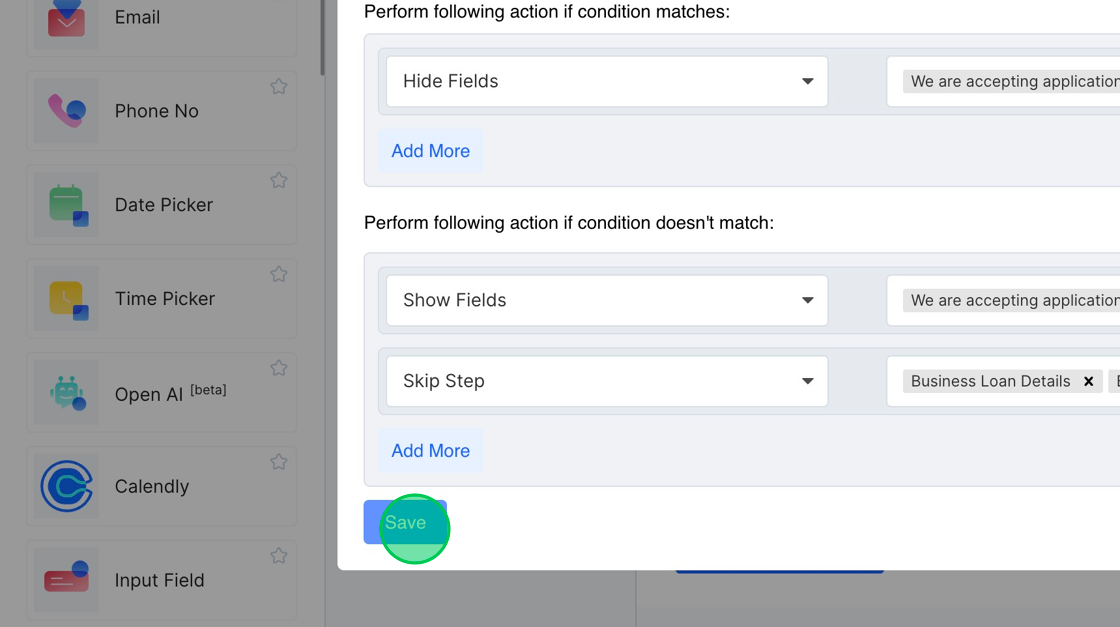
27. You should now observe the newly added “Revenue Filtering” logic. If needed, you can also edit the name of this logic. Simply click on it and type in your desired text.
28. To adjust the value of the communication address to match the billing address when the user indicates that they’re the same, follow these steps. Navigate to the logic section and initiate the creation of a new condition.
29. Assign the name “Address Copy Logic” to this new logic condition.

30. To set the condition, choose the “Is Communication Address similar to Billing Address” field and compare its value to “Yes”. Use the “contains any” operator for this comparison.

31. When the user selects “Yes”, perform the following two actions:
- Copy the value from the “Billing Address” field to the “Communication Address” field.
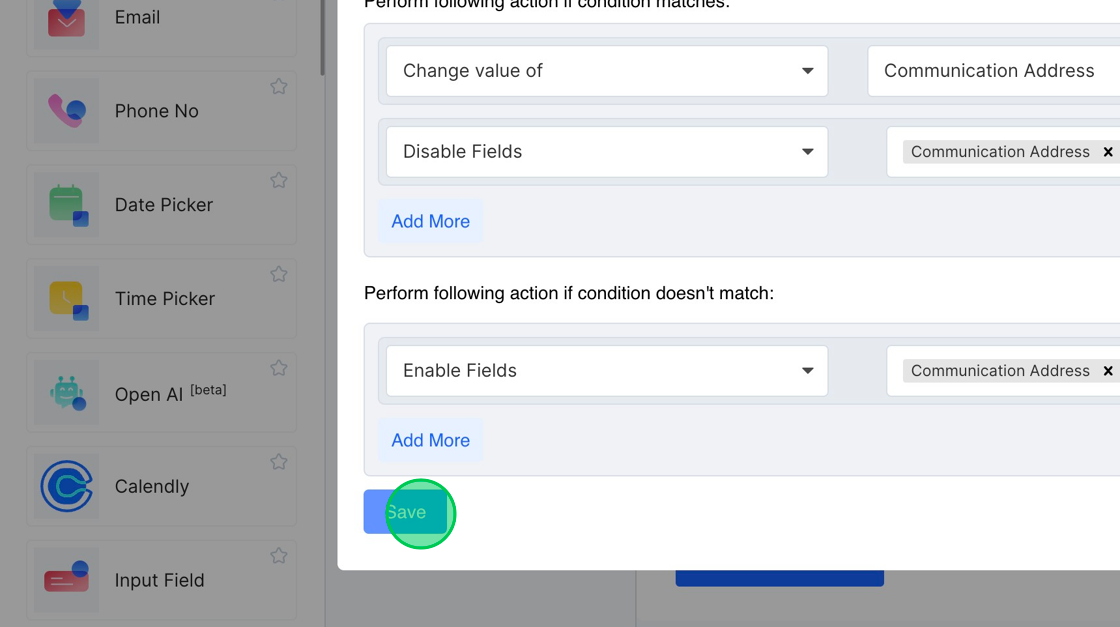
- Disable the “Communication Address” field to prevent the user from making further changes.
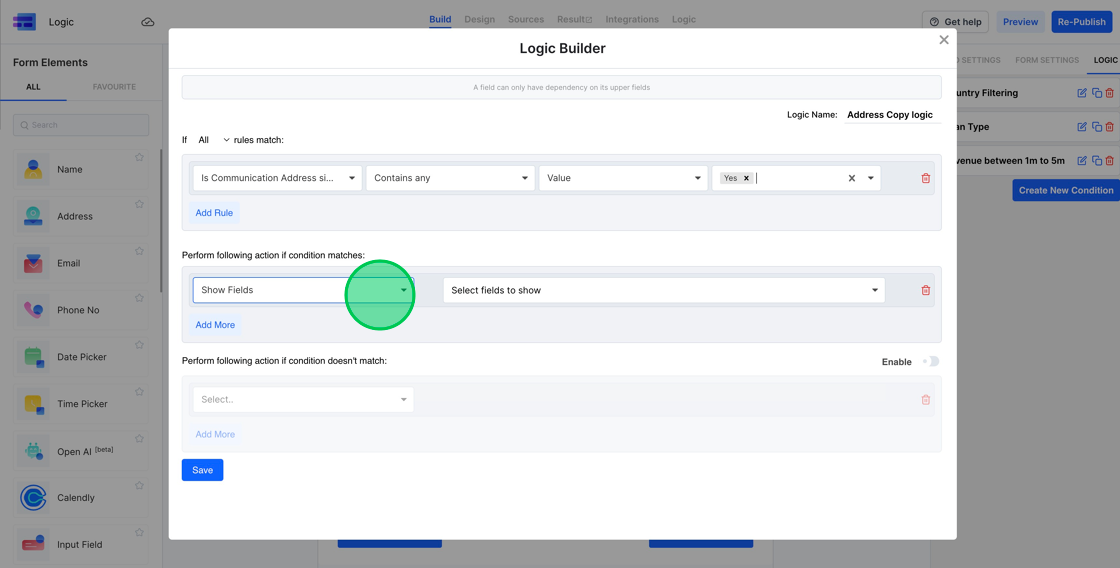
32. To setup the first action:
- Click on the “Change Value” option.
- Choose the “Communication Address” field.
- Specify that its new value should be taken from the “Billing Address” field.

33. To set the “Communication Address” value to that of the “Billing Address”:
- Under the “Change Value” option where you’ve selected the “Communication Address” field, look for the “Value” dropdown.
- From the dropdown, select “Compare with Another Field”.
- A new field option will appear. Click on it and a dropdown list of available fields will be displayed.
- From this list, choose “Billing Address”. This will ensure that the value of “Communication Address” will be set to whatever is in the “Billing Address” field.

34. To disable the “Communication Address” field:
- After setting the value of the “Communication Address” to that of the “Billing Address”, click on the “Add More” button.
- From the dropdown of available actions, select “Disable Field”.
- Once you’ve selected the “Disable Field” action, a new dropdown list will appear showcasing the available fields.
- From this list, select “Communication Address”. This action will ensure that once the user selects “Yes” for the field “Is Communication Address similar to Billing Address”, the “Communication Address” field will be disabled, preventing the user from making any further changes to it.

35. To allow for a different “Communication Address” than the Business Address, follow these steps:
- Activate the “condition doesn’t match” section.
- Choose the “Enable Field” action.
- Select the “Communication Address” field.

36. Press the “Save” button to store this configuration.
37. We’ve now successfully configured four logics. Next, let’s proceed to establish the last two logics, which will determine eligibility for both personal and business loan applications.
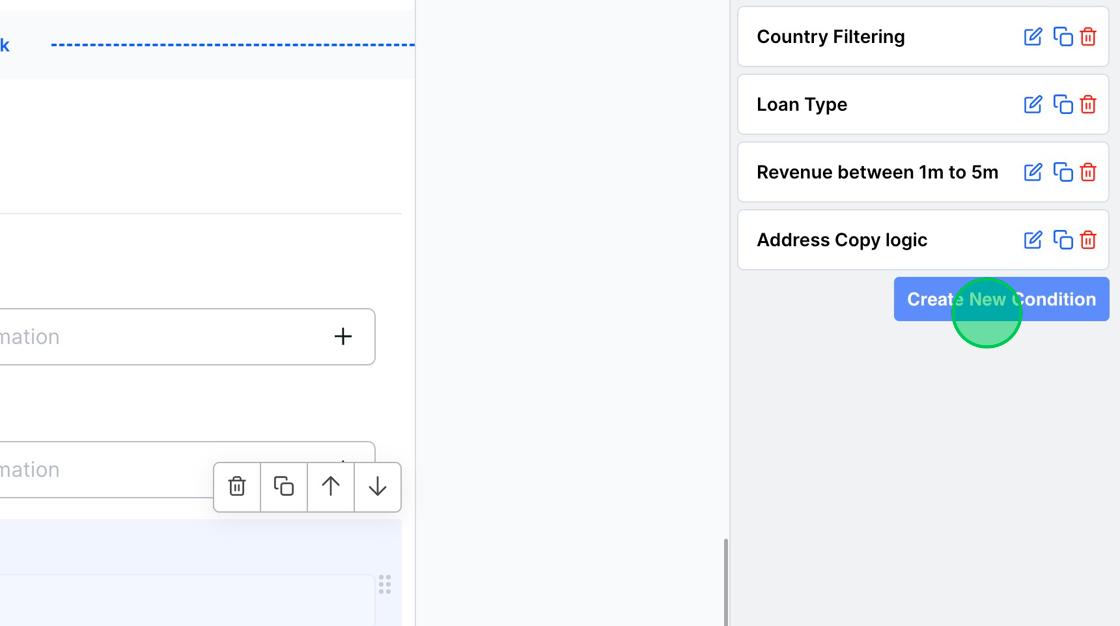
38. Assign the name “Personal Loan Logic” to this configuration.

39. To enforce the logic for the personal loan application:
- Ensure that the application can only be submitted if the “Personal Loan Factor” is below 30.
- In the condition settings, choose the “Personal Loan Factor” field.
- Apply the “Less Than” operator and set the value to 30.

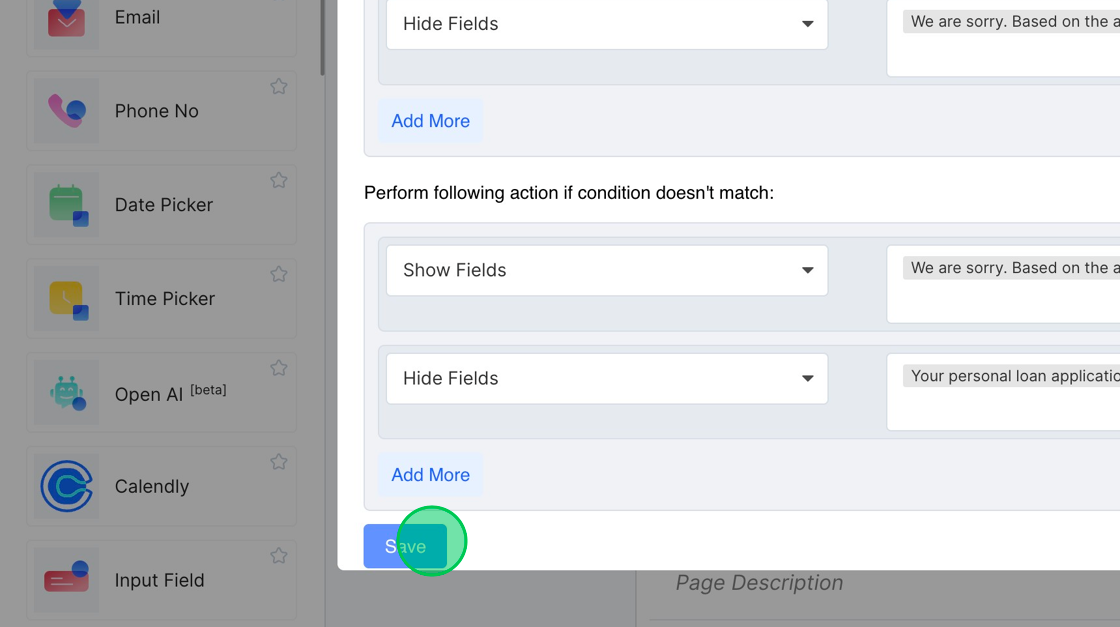
40. To display the appropriate messages based on the condition (i.e., “Personal Loan Factor” is less than 30):
- Use the “Show Fields” action to display the success message.
- Simultaneously, use the “Hide Fields” action to conceal the failure message.
Remember, this process is similar to the actions we’ve taken earlier in this tutorial.

41. For scenarios where the condition isn’t met:
- Activate the “Condition doesn’t match” section.
- Use the “Hide Fields” action to conceal the Success Message.
- Simultaneously, use the “Show Fields” action to display the Failure Message.
This ensures that users receive the correct feedback based on their “Personal Loan Factor” input.

42. Click on the blue “Save” button to finalize and save this logic configuration.
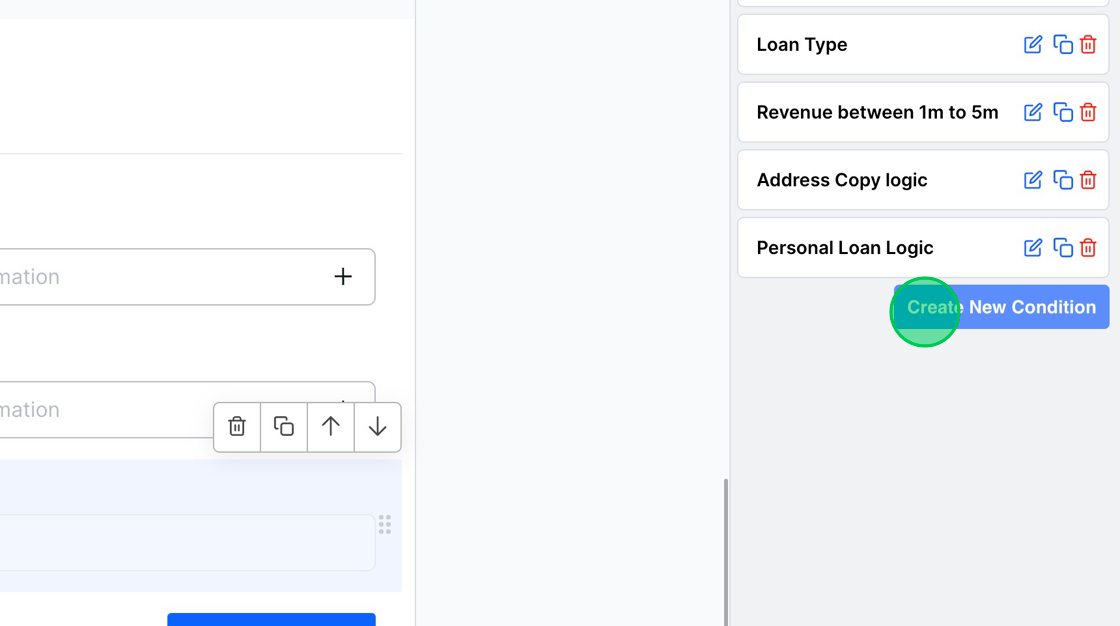
43. Now that the “Personal Loan Logic” is visible in our list of logic, you can follow a similar procedure to configure the logic for the “Business Loan”. Since the process mirrors the one for the Personal Loan Logic, we won’t delve into the details again. With these steps completed, all the desired logics have been successfully set up.
You can check out the form at https://eu.frms.link/3ztnztb/